- News
- Reviews
- Bikes
- Components
- Bar tape & grips
- Bottom brackets
- Brake & gear cables
- Brake & STI levers
- Brake pads & spares
- Brakes
- Cassettes & freewheels
- Chains
- Chainsets & chainrings
- Derailleurs - front
- Derailleurs - rear
- Forks
- Gear levers & shifters
- Groupsets
- Handlebars & extensions
- Headsets
- Hubs
- Inner tubes
- Pedals
- Quick releases & skewers
- Saddles
- Seatposts
- Stems
- Wheels
- Tyres
- Tubeless valves
- Accessories
- Accessories - misc
- Computer mounts
- Bags
- Bar ends
- Bike bags & cases
- Bottle cages
- Bottles
- Cameras
- Car racks
- Child seats
- Computers
- Glasses
- GPS units
- Helmets
- Lights - front
- Lights - rear
- Lights - sets
- Locks
- Mirrors
- Mudguards
- Racks
- Pumps & CO2 inflators
- Puncture kits
- Reflectives
- Smart watches
- Stands and racks
- Trailers
- Clothing
- Health, fitness and nutrition
- Tools and workshop
- Miscellaneous
- Buyers Guides
- Features
- Forum
- Recommends
- Podcast
feature
 Pull pads and spring.JPG
Fitting disc brake pads — learn the easy way to boost stopping power
Disc brakes are becoming increasingly more common. Their pads are a bit more delicate than rim brake pads, in that they can easily be contaminated with lubes and solvents, which renders them pretty much dead. They have good wear properties, but just like rim brake pads there are certain muddy and wintry conditions which can just eat them. Don't get caught short on braking power and learn how to change your disc pads. Here's how to do it.
Our guide below shows you what we believe is the best method to fit disc brake pads. We've included a list of the tools and materials that you will need to complete the job and in some cases where you can buy them. If there are others that you prefer then feel free to let everybody know in the comments.
Tools & Materials
Most disc brakes use the same basic layout. A calliper with top loaded pads presses against a rotor mounted on the hub. The pads have a small hole in the outer plate through which the retaining bolt passes and secures the pads in the calliper body. The pads themselves with use a metal spring with four small legs which fit around the inside edge of the pads to separate them.
We're using a SRAM Rival calliper to demonstrate the process, which is the same for all SRAM hydraulic disc brakes. Shimano discs differ only in the type of retaining circlip, which is fitted externally to the very tip of the thru bolt, rather than inside the calliper body.
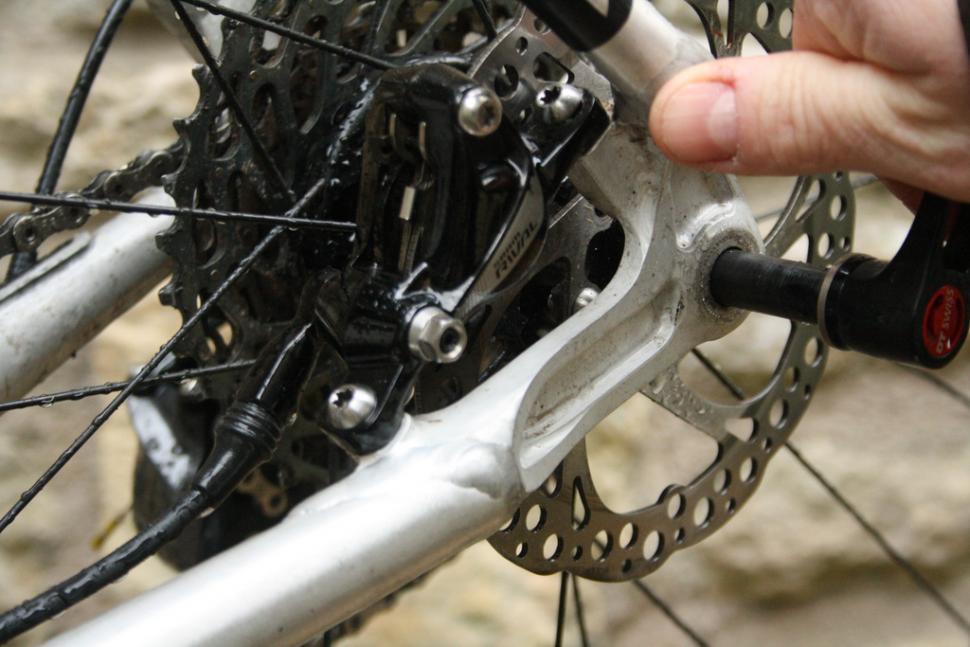
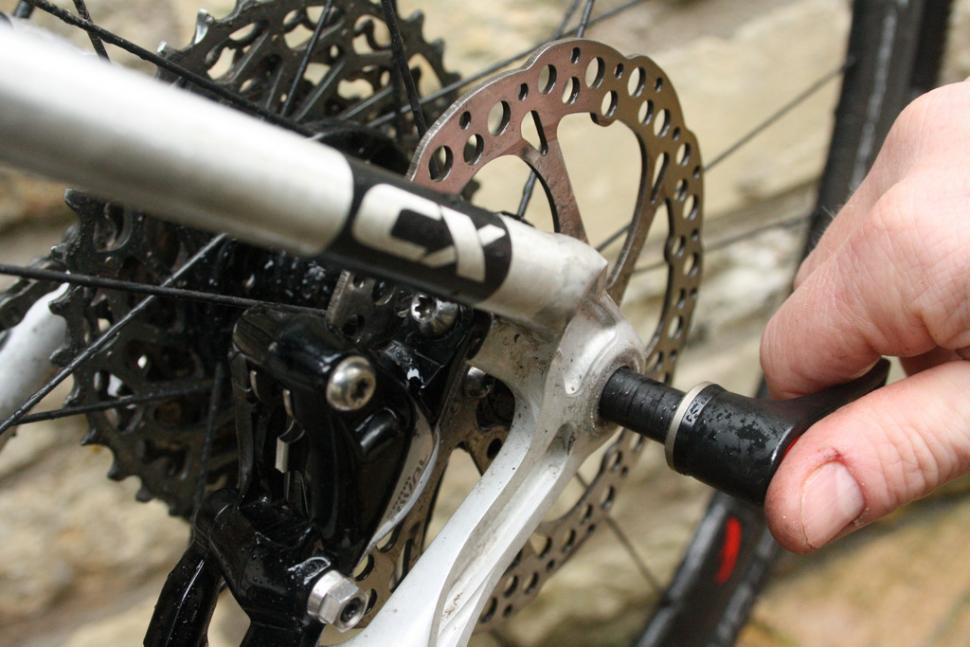
1 Remove the wheel You can't change the pads with the wheel and consequently the disc rotor still in situ. If you're taking out the rear wheel, shift the bike's rear gears so that the chain is on the smallest rear sprocket. Then undo the quick release lever or through axle bolt as seen here and drop the wheel out. Remove the front wheel in the normal way.
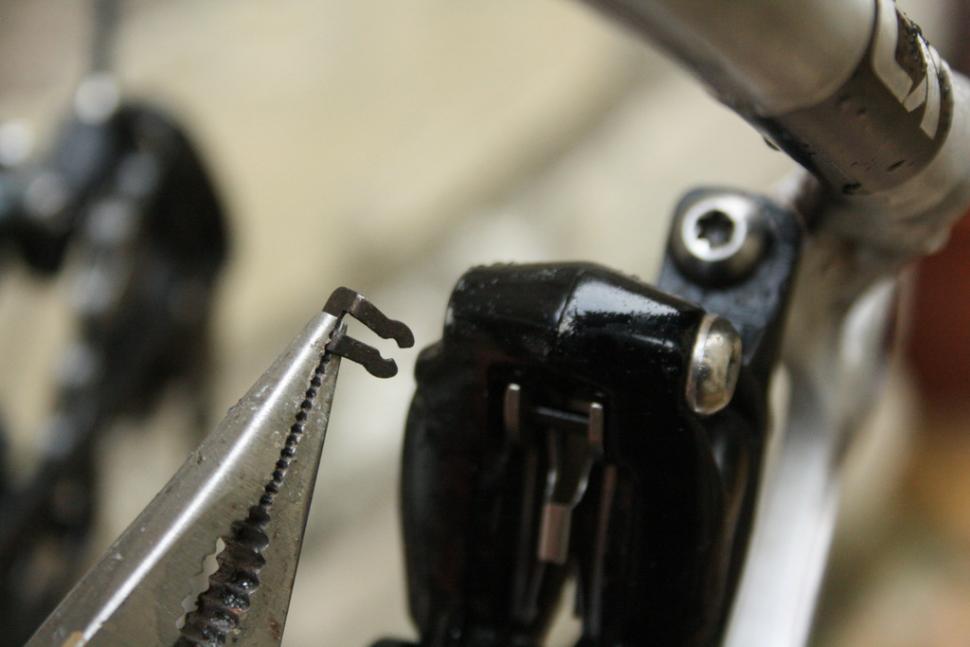
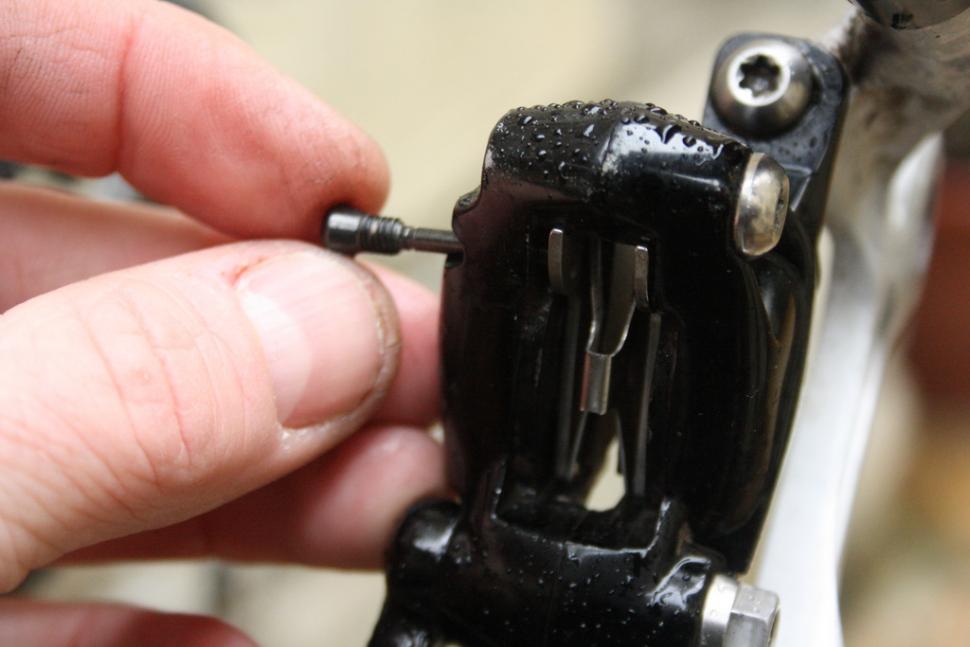
2 Remove the circlip Pick the circlip out with needle-nose pliers. It's possible with fingers, though the edges are sharp and the top face bent flush with the calliper body, so its much easier to use pliers and you're less likely to lose the circlip under the fridge.
3 Undo the retaining bolt With the circlip out of the way, you can undo the alloy through bolt. It requires Torx T10 key. These are found on SRAM bleed kit wrenches and on the CrankBrothers Multi 19 tool we've used here.
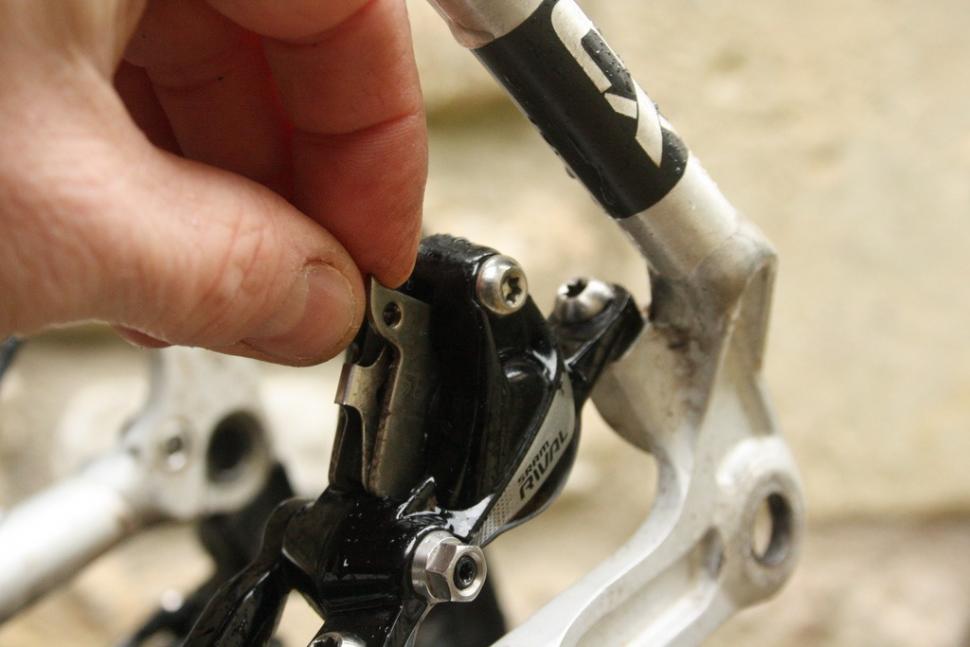
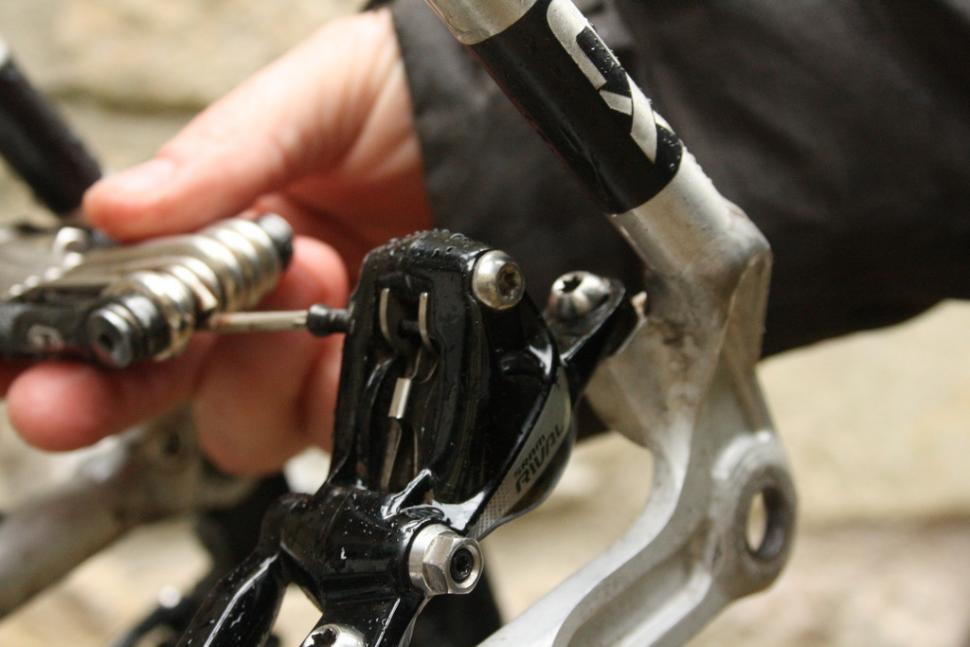
4 Pull out the old pads There's now nothing holding the pads in the calliper. Grasp the two small metal tabs at the rear of the calliper top slot; these are the bits the through bolt passed through. Slide the pads upwards and out of the calliper through the slot in the top of the body, as shown.
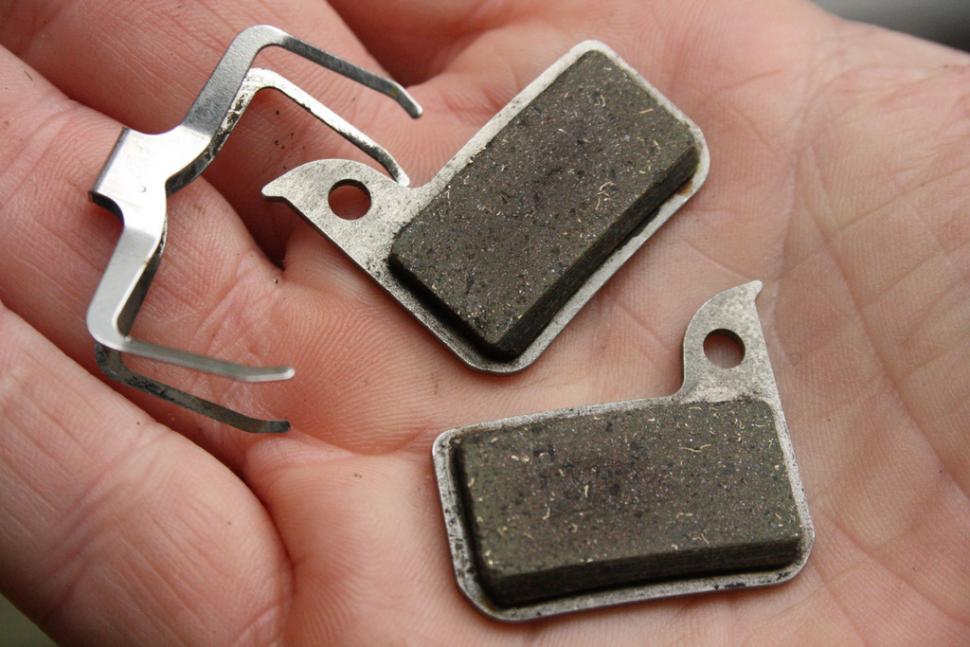
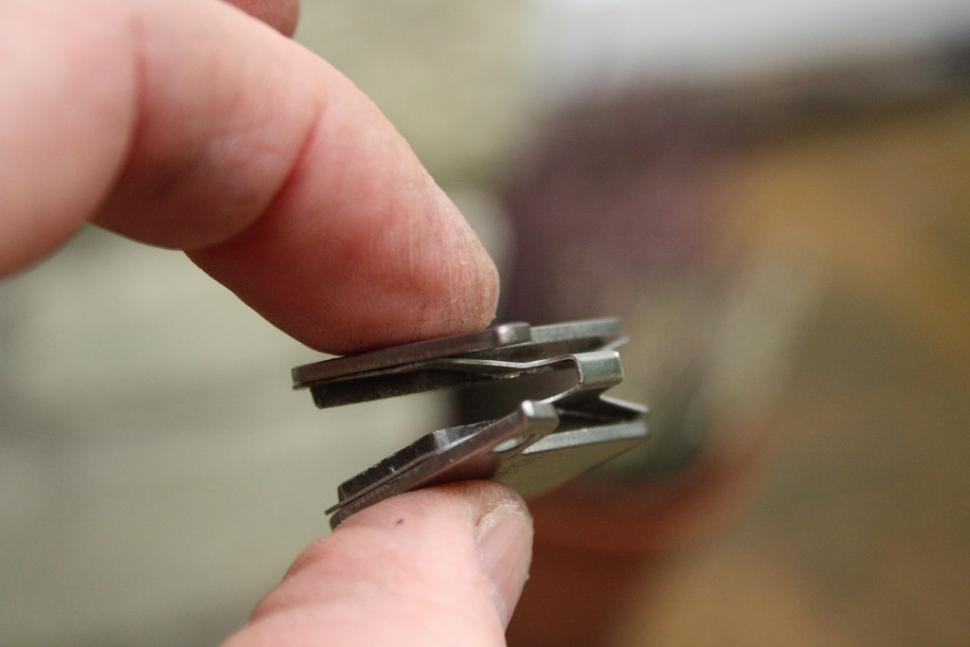
5 The pads and spring The pads will emerge from the calliper complete with their separation spring intact. It'll look like this or worse if you've really ground the pads back to the base plates. These pads still have plenty of wear in them, though they are being removed as they've been accidentally contaminated with brake fluid. This reduces their effectiveness by more than three quarters, and kills the bite required for hard emergency stops.
6 It is an ex pad You can't really see the damage, but you can feel it when you try and brake. If you've got contaminated pads, throw them away. We've baked and sanded the surface of contaminated pads with reasonable success in the past, but they never quite work as well as they do when properly fresh. Replacing pads that are basically new is a bit financially painful, so take care to keep fluids off them when cleaning and lubing your bike and working with the brake fluid.
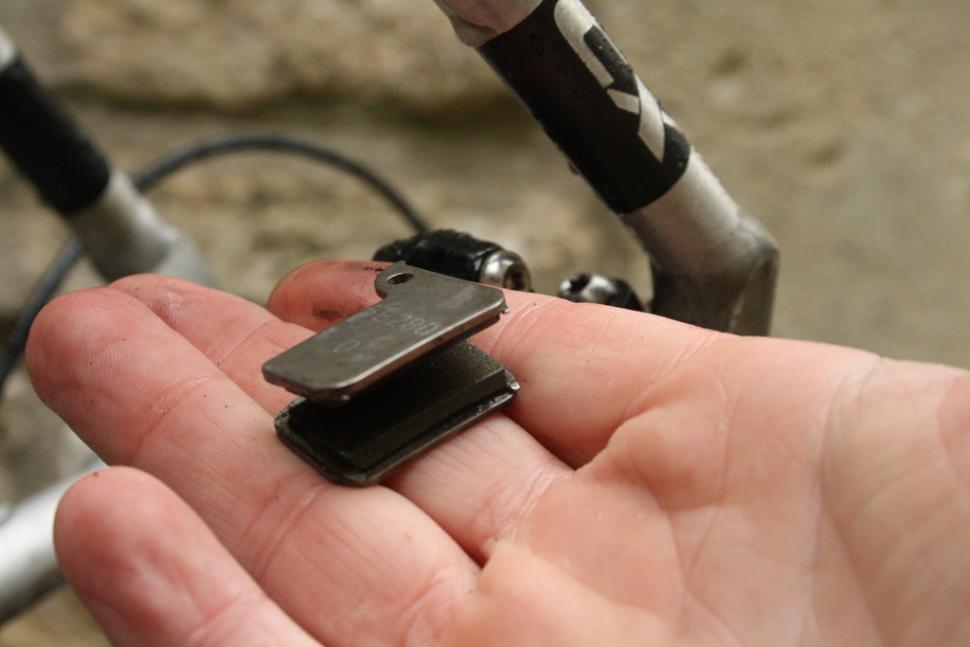
7 Two fresh pads and a fitting spring Technically, these have done ten miles to get broken in and then been in our storage shed waiting until needed. These are ready to take the place of the knackered ones. By breaking in spare pads before you need them, you're always ready for that next ride without worrying that your initial power won't be spot on. Remember to clean the rotor when changing contaminated pads, as the contaminant will be on the rotor's braking surface as well as the face of the pad.
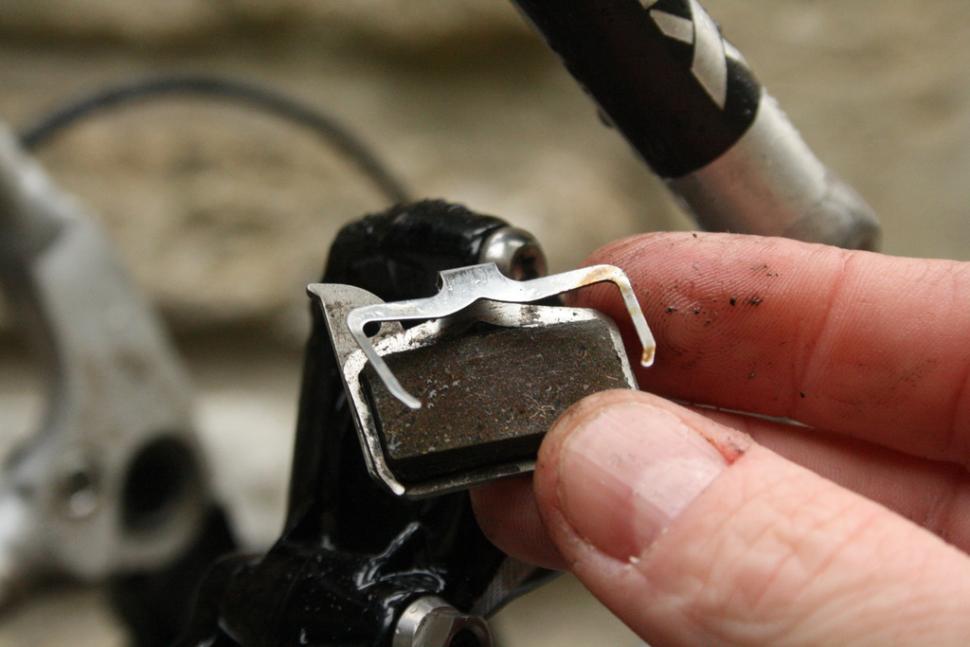
8 The spring in place The spring fits on the pad like this. The arms of the pad spring should lightly grip the sides of the raised pad material. This keeps the pads and spring working together as one unit. The second pad fits the same way. The faces with the pad material on them should be on the inside, facing each other.
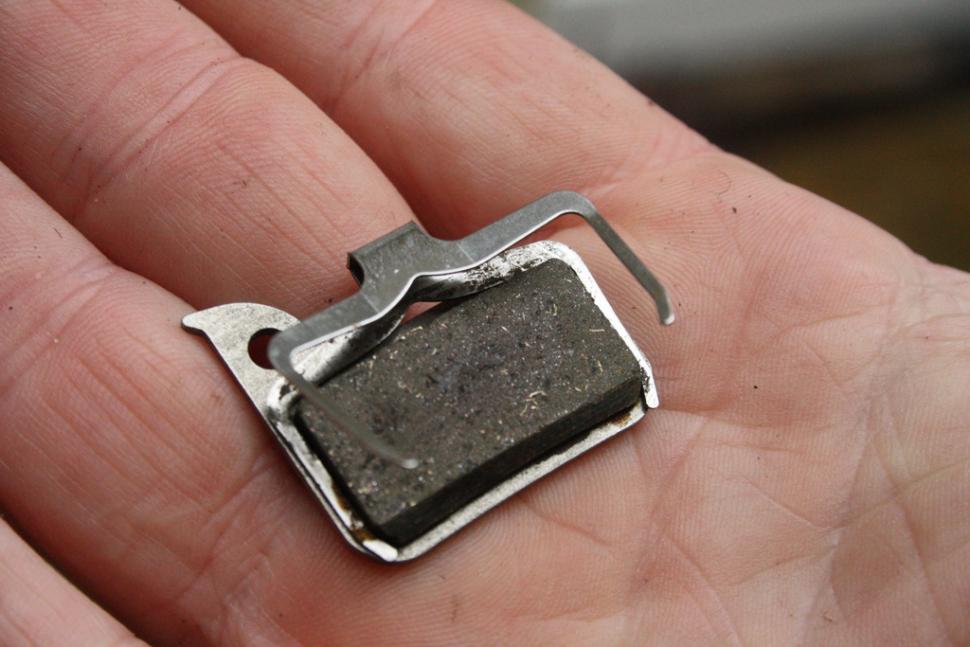
9 The pads and spring, ready to fit The new pads and spring will look like this when assembled and ready to be dropped into the top slot of the calliper. Note the 'hinge' of the spring is at the top edge of the pads, adjacent to the through bolt tabs/hole.
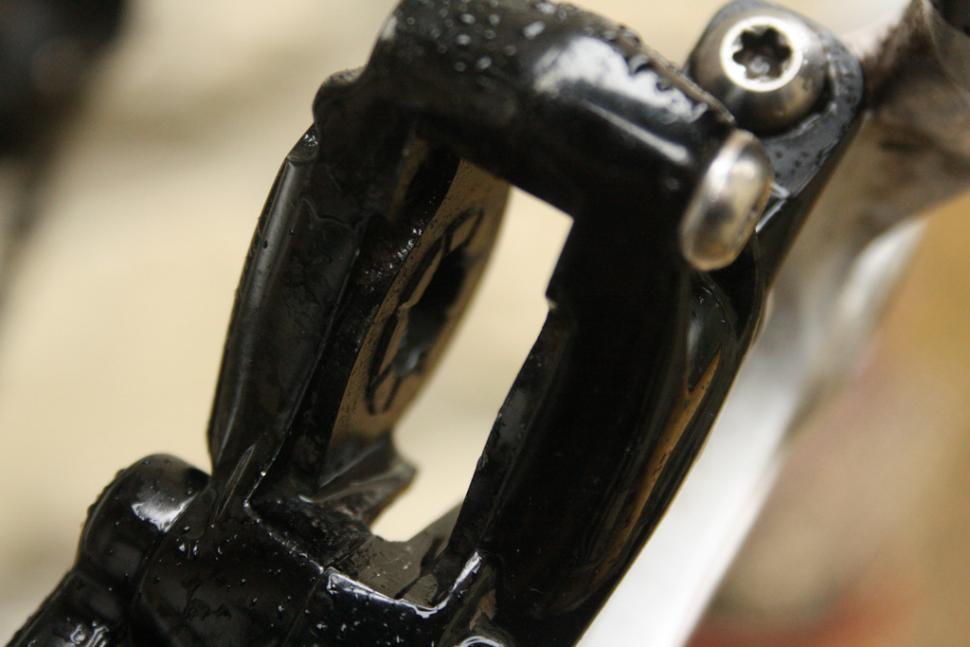
10 The empty calliper While there are no pads in the calliper, it's a good idea to run a clean rag (and make sure it is clean), though the hole left by the pads. This will remove any braking dust and general grime that tends to build up in there, especially in the winter.
Make sure the pistons are fully retracted. You can just see one of the circular piston heads inside the the calliper. If you need to force the piston back, do so with care and use something made from hard plastic, rather than something metal like a screw driver blade. You're less likely to damage the piston head this way.
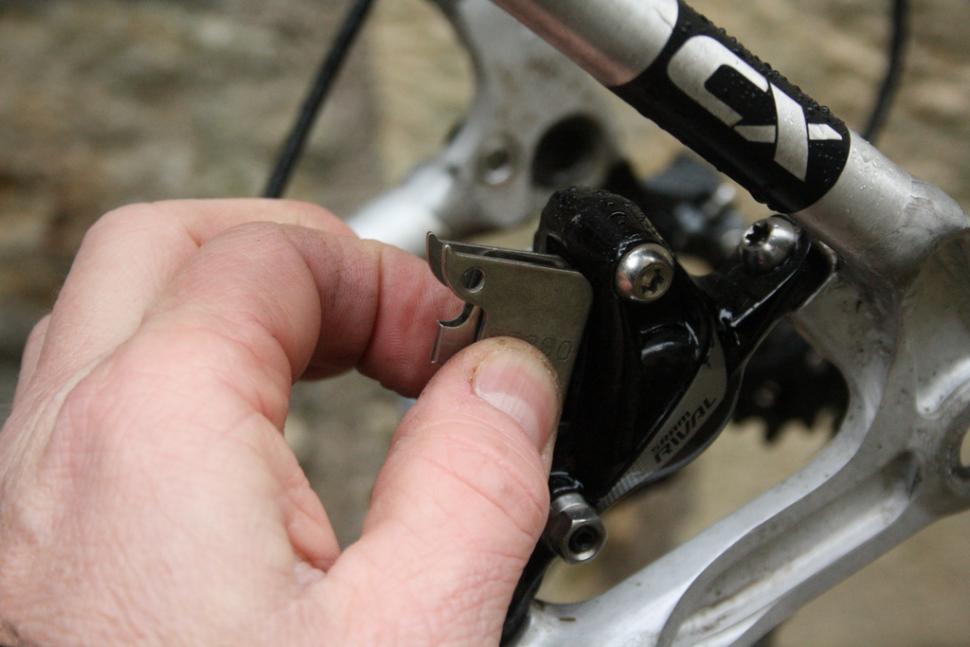
11 Fit the new pads Making sure you've orientated the new pads and spring the correct way, pinch them together and work them back into the calliper through the top slot. They can be a little awkward at times. Take special care not to dislodge the little arms of the pad separation spring as you insert the pads. If the arms become dislodged and you don't notice, when you come to refit the wheel the disc rotor will chew the dislodged arm out of alignment and make the spring unusable. Once bent, they're bin material.
12 Seat the pads If you know the pad spring is in correctly, give the pads a last push from the top to make sure both they and the spring are fully home. If they're not then the retaining bolt won't fit because the holes in the calliper and pads won't line up.
13 Replace the retaining bolt The disc pads are correctly fitted, so the retaining bolt will just slide through. Tighten it with the Torx T10, just enough to nip the thread up, remember the circlip will be there to stop it from backing right out.
14 Replace the circlip Use the pliers to refit the circlip. This is a very small part, but it has a vital safety role so you need to make sure it goes back on. We've had retaining bolts without circlips bolts rattle out and then had the pad self-eject. Quite a moment.
15 Replace the wheel Refit the wheel and do the rear quick release, or through axle bolt up to the correct tension. Spin the wheel and test the brakes. There should be no rubbing from the pads and brake lever travel and bite point should be normal.
>> Read more: The full archive of road.cc maintenance features
Latest Comments
- dh700 6 hours 21 sec ago
You already have cycling route networks that go almost everywhere -- you just need to correct the abuse of those networks by some users. Which is...
- chrisonabike 6 hours 12 min ago
Well I know for UK drivers this is all very new and a struggle. And frankly much of the problem is encapsulated in the conjuction of "residential...
- David9694 6 hours 39 min ago
City junction near the Boundary labelled dangerous by locals...
- JEMVisser 6 hours 53 min ago
That's wild. If I were racing at trek, I would actually prefer the old madone with the new bottles, faster is better😅
- HLaB 7 hours 6 min ago
I only really see one incident (the truck pull out). Thankfully the last time I had something similar it was 10 years ago. https://www.youtube...
- chrisonabike 7 hours 35 min ago
Since we're talking (checks thread again) why UK cycle sales have plummeted to 1970s levels, and now "infra" and "US" ... surely one of the best...
- HarrogateSpa 8 hours 55 min ago
I agree, TV coverage of three stages as a one-time-only does nothing for the sport of cycling.
- dh700 6 hours 40 min ago
One of, and maybe the only, redeeming values of the post-my-life culture, is that some of the adherents will do the cops' job for them -- which is...
- quiff 10 hours 5 min ago
You can both be right - the scheme was introduced by Labour, but the fines levied under it increased dramatically in 2023 under the Tories.
- slc 12 hours 3 min ago
Agreed, there was no supension. There were various modifications of the plan, and a long time before the Beafort Rd and Crews Hole Rd one way plan...

Add new comment
26 comments
Disc brakes offer superior performance? Only if your 'rim brakes' are just crap or you don't know how to set them up properly.
Disc brakes on off road bikes yes, but on a road bike you are all just 'dedicated followers of fashion'.
Agreed.
I have hydraulic disc brakes on my Winter bike but am just as happy with the braking of my rim brake bikes.
It's so easy to put a pair of Kool stop salmon pads in the rim brakes for better wet weather performance and they last all Winter.
Maybe, but honestly I'm much more at peace since I have disc brakes. They brake consistently all along the lifecycle of the break pads. No cable adjustement needed every now and then and I don't have to remove bits of metal from the rubber pad anymore. So I won't go back to the rim brakes for sure.
I kind of agree with this but...
Braking on aluminium rims in the dry may be as good as discs or close enough that it barely maters. However one advantage of hydraulic discs that seems to be rarely discussed for roadies is how much easier on the hands they are to opperate.
It might just be me but coming down a long, cold decent with lots of braking, my hands can start to cramp up after a bit. Disc brakes require much less effort to opporate continuously I find that that is much less of an issue.
I'm less sold on the rubbing after hard use or the increased weight and aero drag compared to rims. On balance I think I'm happier to have discs but I think Shimano, Campagnolo and SRAM could do more to improve the current offerings.
I remember the shiver I'd get down my spine every time I'd consider riding a coast road with my disc brakes in tow. Some grains of sand are the achilles heel to all disc systems. Bike was launched.
And don't get me started on those wet country roads.
Rims for ever.
Thanks for that.
Mine have bite point adjustors, I suppose I'll take a look when that's all used up.
I'd hope not to quite get to the metal on metal grinding.
And don't good hydraulic brakes self adjust to compensate for pad wear?
How do I know that I have worn through most of my disc brake pads and they need changeing?
your levers will be moving to almost touching the bars, you’ll hear a metal on metal noise, and your brakes won’t be very effective. Once you get used to taking them apart and putting them back again, it’s no great shakes to check them from time to time. Practice makes perfect.
There was no decrease in the effectiveness, nor any change with the bite point on the levers, as the pistons had moved with the declining meat on the pads. What I did notice that when there was very little left on the front set, was that they started to moan a little under braking, I don't know if anyone else has experienced this, and I will not rely on it, but it was noticable.
I turn on a flashlight, put on my reading glasses, and look through the top of the calliper. I can see how thick the pad material is. Shimano recommends 0.5 mm pad thickness minimum, which means it will look really thin.
I could never get a light source like that to work on the front.
In the end, I found that if I was in the garage, then the natural light coming in plus the darkness of the garage was just right to see the gap.
I recently fitted gorilla red pads but it still squeals on heavy braking !
You check them as you would check your tyres, chain, cassettes and mechs for wear, and when the pad material has nearly gone them they need changing.
All of the above fills me with the smug satisfaction that I've still got rim brakes on both of my road bikes and V brakes on my old MTB.
I must be doing disc brakes wrong. Zero issues here with braking performance right down to the point that only the metal backing plates were left on the pads... Replaced and adjusted for the (now) full depth pads and no issues. This is with TRP Spyres, but same with the Shimano Deore hydraulic set on the MTB
Did you hear a loud clicking while working the lever when the Spyre pads wore down to the backing plates? Mine did. It was the centering spring slapping loudly against the backing plates. For me, that was the blatant reminder that they needed replacement.
Otherwise, they're excellent, especially when paired with semi-metallic pads from either Ashima or Jagwire. Shimano's original B01S resin pads are good, but wear down far too quickly for my riding.
So good are the Spyres that I bought an extra pair of calipers. When I eventually buy a cross bike for my wife-to-be, I'll be replacing the stock stoppers with those.
The Spyres are good, aren't they? If you want to improve them and save a ton of cash, look at getting a few sets of the semi-metallic pads from Discobrakes.
worth mentioning that some pads don't look like the illustration shown but have built in heat sinks
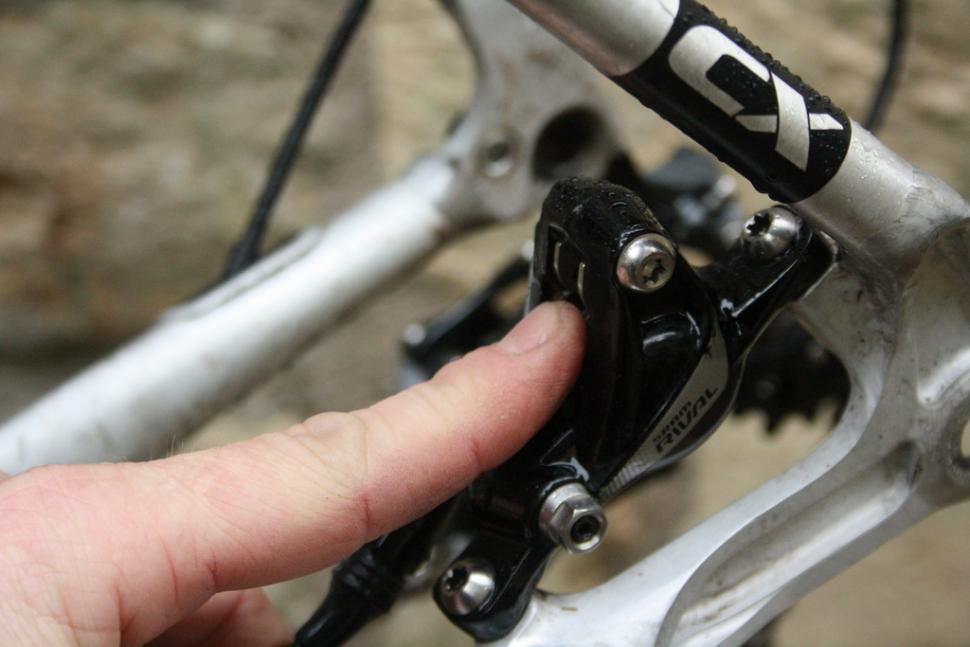
A brake with pads in looks like this
If you have Avid BB5s,
a) throw them away, or
b) spend three years trying to adjust the b@stard things and then throw them away.
Incidentally with BB5s you can't remove both pads simultaneously. You have to tease one out, then remove the spring, then the other pad.
the business card method works OK with BB5 brakes:
http://bikeshopgirl.com/2011/08/how-to-properly-setup-and-adjusting-avid...
with really good brake cable housing you should be able to acheive satisfactory levels of performance. They won't approach hydraulics as far as feel at the lever goes but they will stop you really well.
Thanks, but tried that. And many other things. A slightly warped front disc didn't help admittedly.
Replaced the BB5s with TRP Spyres. Took half an hour to fit both F+R. Attach cable, finger tighten the caliper mounting bolts, pull brake lever to centre the caliper, tighten bolts, wind in the pads a touch and take up the cable tension, couple of hard stops and they're a bazillion times better, instantly.
..... Replaced the BB5s with TRP Spyres. Took half an hour to fit both F+R. Attach cable, finger tighten the caliper mounting bolts, pull brake lever to centre the caliper, tighten bolts, wind in the pads a touch and take up the cable tension, couple of hard stops and they're a bazillion times better, instantly. [/quote]
I agree they are a doddle to fit and blindingly simple to adjust but I'm not completely satisfied with mine. Firstly the original pads are poor, even when thoroughly bedded in. I'm not sure they are even a good fit in the calliper, coming as they do from an old Shimano design. Also stopping was only average and I was expecting something better. And the front brake would chatter unless there was a blob of grease on the back of the pads. Things looked up when I swapped them for some Disco pads but I'd still only give them a seven.
And, after a couple of months use they started to adjust themselves. Now, don't get me wrong, I'm a big fan of automation but this is a step too far. The allen key adjusters have no locking screw and they simply unwind slightly, which upsets the efficiency. I'll try a drop of Loctite when I'm next working on the bike and hope that solves the problem.
But, moans aside, they are good brakes, possibly the best cable stoppers you can buy. It's such a pity that a couple of cost-cutting measures have taken the gloss off the purchase.
good to know - at the moment I'm happy with my BB5 brakes but should a set of Spyres pop up on eBay I might go for them.
I'm currently running MTB pull brakes with bar end shifters and am missing STIs a bit, so it would be an easy route back to those.
16 Spend the next three hours swearing as you try to eliminate that last tiny bit of rubbing that seems to happen every time I do any maintainance on my brakes
Spent about that time on a mountain bike front brake over the last few days. Its very slightly warped but not enough to think it would be a problem. Have now given in and ordered a new rotor!
Have you spent at least two hours trying to fix the warp with a pair of pliers?
If not, you need to.
Otherwise you're not allowed to buy a new disk.
"Disc brakes offer superior performance, but only if the pads are fresh". And only if they are properly bled.