- News
- Reviews
- Bikes
- Accessories
- Accessories - misc
- Computer mounts
- Bags
- Bar ends
- Bike bags & cases
- Bottle cages
- Bottles
- Cameras
- Car racks
- Child seats
- Computers
- Glasses
- GPS units
- Helmets
- Lights - front
- Lights - rear
- Lights - sets
- Locks
- Mirrors
- Mudguards
- Racks
- Pumps & CO2 inflators
- Puncture kits
- Reflectives
- Smart watches
- Stands and racks
- Trailers
- Clothing
- Components
- Bar tape & grips
- Bottom brackets
- Brake & gear cables
- Brake & STI levers
- Brake pads & spares
- Brakes
- Cassettes & freewheels
- Chains
- Chainsets & chainrings
- Derailleurs - front
- Derailleurs - rear
- Forks
- Gear levers & shifters
- Groupsets
- Handlebars & extensions
- Headsets
- Hubs
- Inner tubes
- Pedals
- Quick releases & skewers
- Saddles
- Seatposts
- Stems
- Wheels
- Tyres
- Health, fitness and nutrition
- Tools and workshop
- Miscellaneous
- Cross country mountain bikes
- Tubeless valves
- Buyers Guides
- Features
- Forum
- Recommends
- Podcast
feature
 How to fit headset cups 04
How to fit headset cups in 8 easy steps
It’s important that your headset cups — the steering bearing parts that fit in the frame — are tight and secure. Here’s how to press them properly into place.
If your steering doesn’t turn smoothly, your bike won’t handle right. For the two bearings that make up the headset to work right they have to be properly aligned. In some frames this is taken care of by bearing holders built into the head tube, but in many frames the whole headset is a separate component that fits in the head tube.
The headset cups fit tightly into the head tube, so tightly in fact that the outside of the cup is very slightly larger than the inside of the head tube. This is known as an interference fit, and is what makes sure the bearings don’t move in the head tube.
That means you need a lot of force to get the cups into place. That can be done by hammering the cups into place (protecting them with wooden blocks) but a far better way is to use a purpose-made headset press.
Our guide below shows you what we believe is the best method to fit a headset cups. We've included a list of the tools and materials that you will need to complete the job and in some cases where you can buy them. If there are others that you prefer then feel free to let everybody know in the comments.
Tools & Materials
How to press headset cups into a frame
Pressing headset cups into a frame is one of the jobs that many bike owners fret about. It's really quite simple to do, but it really does require the right tool for the job and that is a headset press, a simple screwing mechanism which ensures the cups remain properly aligned as you press them into the frame.
1 Grease the head tube Use a little grease to ensure a smooth, easy fit that won't damage the head tube, or the alloy headset cups. We're using a copper based anti-seize compound by Finish Line. It's ideal for ensuring there is less chance for corrosion, or cold welding with metal on metal parts.
2 Spread the grease around Prep the upper and lower ends of the head tube. Use a finger to wipe the compound round the edge. You're looking for about three quarters of an inch of the inside edge covered.
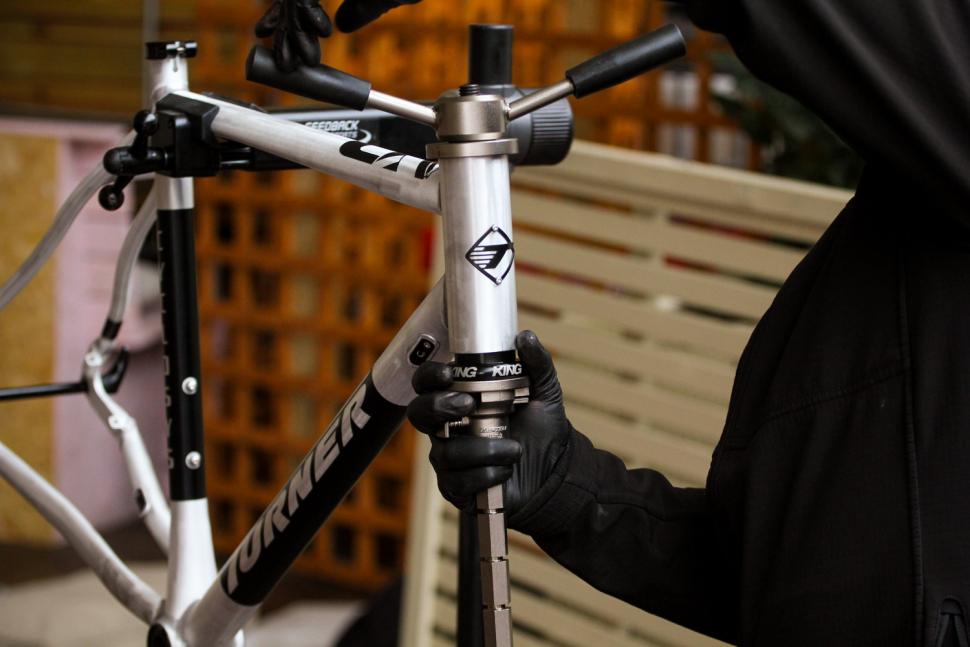
3 Fit the bottom race We will begin with the lower cup of the headset. Release the bottom plate from the press. Lower the press shaft through the head tube. Place the bearing on the bottom plate and slide both back on the shaft. The press tool will have a spring loaded lock which work with detents on the press shaft to take up excess shaft length. You can see the spring lock between my third and forth fingers. Once the headset cup is squarely presented to the head tube and the lower press plate is locked to the shaft you're ready to begin.
4 Turn the press handle to push in the cup The trick is to go slowly and keep an eye on the lower cup to ensure it's being pressed in evenly. It should be, because the weight and squarely applied force mean that force from the side is minimised. Keep turning the handle. It'll be quite stiff; this is quite normal and actually a good sign. If the cup isn't a tight fit it can come loose, leading to premature wear and damage to the head tube.
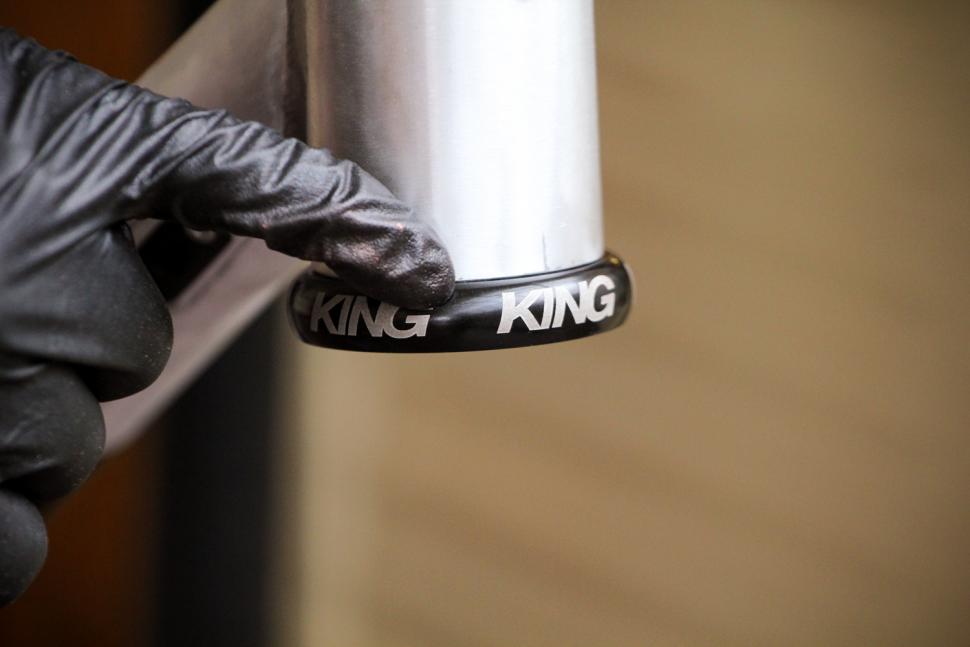
5 Keep going until you feel the handle reach its stop and the lower cup is fully home. Don't just assume it's in place though. Inspect the point at which the lower cup and head tube meet. There should be no gaps anywhere around the circumference of the union between both elements. If there it, then give the cup a final tweak to close it up.
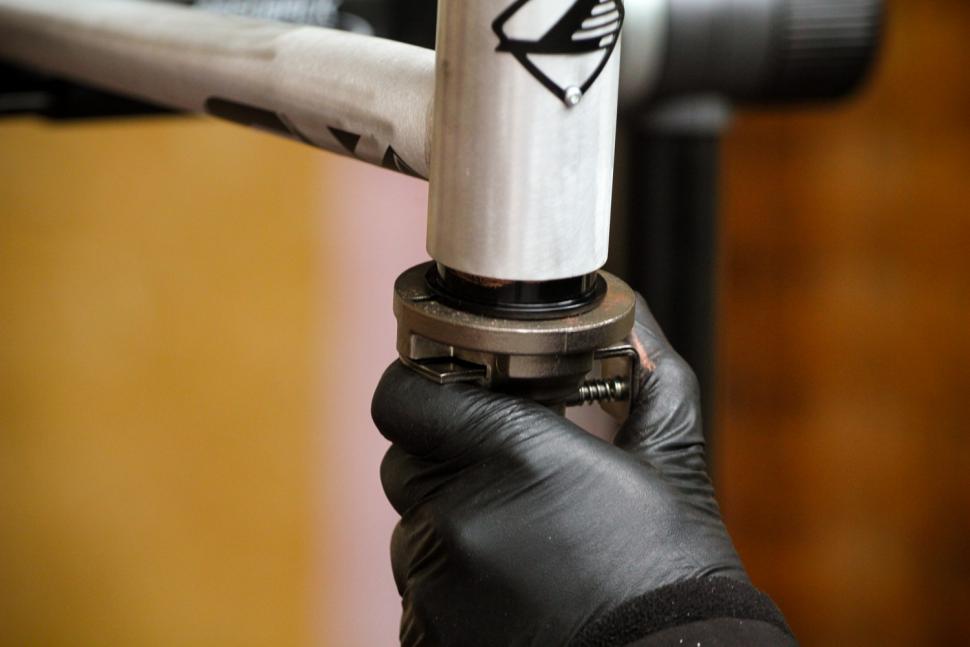
6 Fit the second cup To get the top cup in, we've turned the frame upside down in the workstand to make the job easier. As with the lower cup, remove the lower press plate first. Lower the press shaft through the cup (on top and out of this shot now that you've turned the frame upside down), taking care to use a stepped bearing drift to locate the shaft and handle assembly squarely in the lower cup. Place the upper cup on the base plate (as shown here) and when everything is squarely presented you can begin to turn the winding handle and press the cup in.
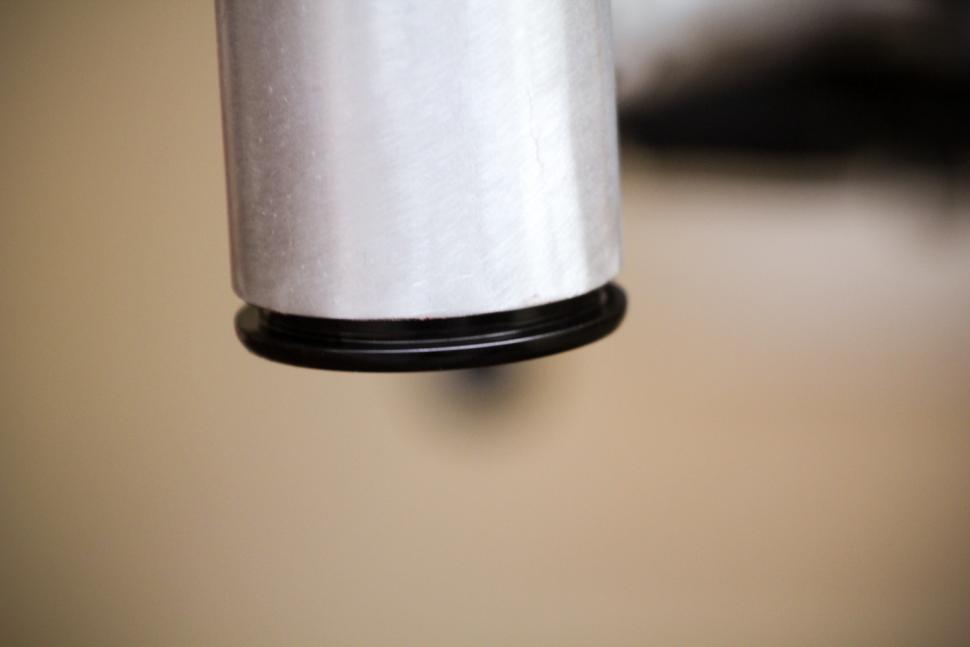
7 Going in square Here we've stopped halfway and removed the tool to show how the cup should be going into the head tube: squarely and evenly. With this style of headset the lower cup has an external bearing, and the top cup (pictured here) fits inside the head tube, wth only the lip of the cup sitting on the edge of the head tube.
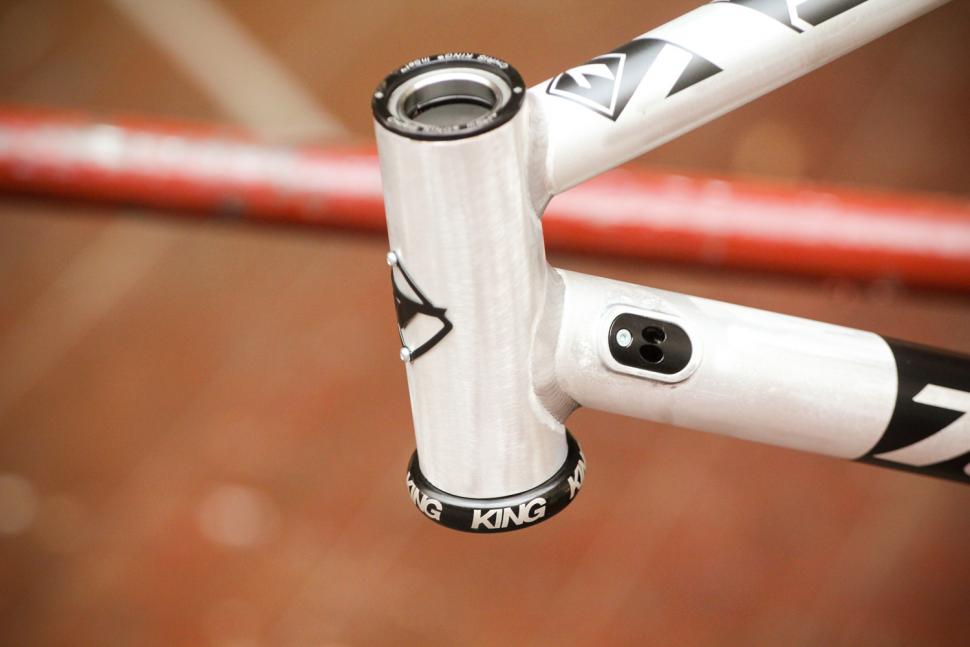
8 Fully home Once the top cup is fully pressed home, remove the press. Inspect the union between the top cup and the edge of the head tube. As before there should be none. You now just need to slide the crown race on the fork and drop the top cup bearing shield into position before fitting the fork.
>> Read more: The full archive of road.cc maintenance articles
Latest Comments
- ymm 32 min 28 sec ago
I was led to believe that the police are meant to protect the public through.... err..... policing? This level of laziness on the part of the...
- MTB Refugee 32 min 46 sec ago
I'd be interested to know what the power difference is at a more reasonable 30km/h between the hoods and the drops, 38 and 42 bars....
- the little onion 51 min 5 sec ago
Your reminder that, per mile travelled, taxi drivers are more likely than any other kind of driver to be involved in a pedestrian or cyclist death,...
- OldRidgeback 56 min 6 sec ago
What a disgusting comment. Perhaps he should have to meet with the families of some victims of poor driving.
- OldRidgeback 58 min 44 sec ago
Trump probably can't understand that the revenue from congestion pricing is going towards upgrading the transit system. Somebody could maybe draw a...
- David9694 59 min 41 sec ago
next up Colin (84) from Chapel Allerton complained that there were no machines to pay for parking and although he is perfectly competent to handle...
- chrisonabike 1 hour 46 min ago
Well - why wouldn't they be happy for everyone else to share the insurance costs? Perhaps they're not paying any, or like canny Lancashire drivers...
- Fatbagman 2 hours 5 min ago
So who in cycling is going to make any money out of this particular deal? Will the money being generated by TNTs greed go to any cycling group or...
- wtjs 2 hours 24 min ago
If you cycle, you cannot trust the police. They are your enemy, not your friend...
- Secret_squirrel 2 hours 39 min ago
Are we really meant to believe the cyclist punched off one wing mirror, jumped off his bike, ran around the other side to punch off the other, and...

Add new comment
21 comments
I bought a long bolt, nut and some large thick washers, couple of quid.
Ive fitted 5 Bottom brackets, one headset cups and numerous bearings pressed into place. I agree you need some special tools, but pressing BBs and headsets isnt one of them
Edit, I wish they would stop re hashing old posts. I commented 6 months ago earlier in the thread.
I bought one of those sets from FleaBay and somehow managed to gouge a bottom bracket by adding more force when the bearing was a bit wonky. I fully accept that it was me being heavy-handed and forcing it when it shouldn't have been forced - that's why I ended up springing for the proper tool to avoid causing more damage to the frame.
I bought myself one of those Park Bearing Press tools to install bottom bracket bearings (it's multi-purpose). Possibly my favourite tool - a heavy chunk of smoothly spinning metal and you can't help but be impressed by its weight.
However, as I've only used it a few times, I think I may have a problem with buying bike tools.
I had to resist buying yet another quality bottom bracket spanner to fit my new shimano threaded unit.
It would seem that shimano are changing the spline dimensions at quite a regular rate, got a cheap little adaptor instead. Might come to regret it, but if the expensive tool only lasts one BB, it just didn't seem worth it. It is against everything I have come to stand for though.
I do understand the need for the use of workshop gloves, I wear them myself, but is there any reason to protect the identity of the mechanic?
Could it be that they are the same person as this individual?
secure-1-open.jpg
Several large washers, 2 nuts and 12" threaded bar, this will install headset cups, bottom brackets and bearings
Stop - Hammer Time!
Will you be doing a review of the Turner CX bike you fitted the headset to?
I've replaced about thirty headsets over the years. A decent pound hammer and a block of hardwood every time, no fuss. I've done this on titanium frames, carbon frames, steel frames and alloy frames - same result every time - a perfectly fitted headset.
You can fashion a press for headsets, bottom brackets, anything really, out of a length of allthread, two nuts and some nice, fat washers. Starting cost less than a fiver, then less than a quid every time you need to add some other washers to press in something with a different diameter.
Did this to replace the bearings for my old FSA Omega MegaExo, a weird size that Shimano don't do, so did a bottom bracket rebuild, rather than shelling out 30 quid for a replacement FSA part. Needless to say, I went a bit too cheap on the bearings, not liberal enough with the grease and one seized after 6 months. Mind you, that wasn't far off the originals!
The LBS did the last headset I had with press in cups and relieved me of £5 but he did line up the cups and had the logos facing forward on both cups which I only remembered about on the way back to collect the frame.
Hmm. I attempt most jobs at home, and have fashioned my own headset press as detailed above (for steel-framed 1" cheaper external headsets), but there is *no way* I would attempt to fit a Chris King headset at home!
Plus there is just such a massive amount of weird things that can go askew. I've just had to take in a frameset to the LBS because I couldn't diagnose the headset problem, which was that the fork crown was too shallow. I should have just taken it in to the bloody shop in the first place, it would have saved a load of headscratching.
I do the vast majority of my own spannering myself, but to be honest I can't really see the point of doing this particular job yourself. My very vague formula is:
very infrequent job + very expensive tool + high potential for frame-ruining mistake = just take it to a shop.
For me anyway. If you go through bikes like hot dinners and/or take particular pride in doing absolutely everything yourself then fair play though.
The wood'n'hammer thing can work but when it didn't on the second cup for me the LBS did the other cup for a fiver. Better than buying a tool.
or a rubber mallet?
works for me!
Yep, much cheaper than buying a tool which will hardly ever be used. I also saved money by using a socket and extension to remove the old cup.
You managed to get a headset in with a rubber mallet?
Impressive.
unless you're planning on fitting a lot of headsets (ie you are a bike shop) there's no way you should be buying a press rather than getting a shop to fit it.
Of course, if you're desperate to try it yourself you could always use two small plates, a bit of threaded rod and some nuts.
Further to this - the new bb that has just replaced the "old one" of 330 miles usage - that was expertly fit by my LBS with very a expensive press - now runs silently and spins like a dream.