- News
- Reviews
- Bikes
- Components
- Bar tape & grips
- Bottom brackets
- Brake & gear cables
- Brake & STI levers
- Brake pads & spares
- Brakes
- Cassettes & freewheels
- Chains
- Chainsets & chainrings
- Derailleurs - front
- Derailleurs - rear
- Forks
- Gear levers & shifters
- Groupsets
- Handlebars & extensions
- Headsets
- Hubs
- Inner tubes
- Pedals
- Quick releases & skewers
- Saddles
- Seatposts
- Stems
- Wheels
- Tyres
- Tubeless valves
- Accessories
- Accessories - misc
- Computer mounts
- Bags
- Bar ends
- Bike bags & cases
- Bottle cages
- Bottles
- Cameras
- Car racks
- Child seats
- Computers
- Glasses
- GPS units
- Helmets
- Lights - front
- Lights - rear
- Lights - sets
- Locks
- Mirrors
- Mudguards
- Racks
- Pumps & CO2 inflators
- Puncture kits
- Reflectives
- Smart watches
- Stands and racks
- Trailers
- Clothing
- Health, fitness and nutrition
- Tools and workshop
- Miscellaneous
- Buyers Guides
- Features
- Forum
- Recommends
- Podcast
OPINION
Wheelbuilding with Wheelsmith
 Wheelsmith-1
Last year, I built some wheels. It took me ages and the rear wheel dishing was off but I built them, and rode them, and I was proud of them. But they weren't right.
For the previous two winters, I'd ridden factory-built wheels and after 3,000 or so wintery miles they were junk. One set had wafter-thin pad-eaten rims, whilst the other set ended up with cracked eyelets. I was disillusioned, buying a set of wheels each year to chuck away before the following winter. My complaints to other cyclists were unanimously met with “you should get some hand builts”. Being a bit thirsty for knowledge, I decided to have a crack at it myself so I obtained the relevant parts (hubs, rims, spokes, nipples), borrowed the bike club wheel jig, got some e-books off the internet, talked to a few people then set about lacing them up.
Build 'em up
It took ages, I made mistakes, I corrected mistakes, it infuriated me, but I quite liked it and ended up with a nice set of wheels that I rode through the winter. Foolishly I whacked in some cheap brake pads at some point, and during one wintry ride, they got stones stuck in them and ground down the rims, so this year a replacement set of rims was obtained and I started rebuilding them. I'd got a dish tool so I was determined to correct previous mistakes and have them running spot on. Unfortunately, time pressures of work, parenthood and everything else that constitutes a 21st Century life meant that I was trying to do it late at night in a cold shed... cue two wheels that looked like Pringles.
Social media done good
Luckily for me, a friendly tweet by a fellow twitter user (thanks @euancx) alerted me to a course being run by Derek McLay of Wheelsmith.co.uk, An Introduction to Wheelbuilding. It was being run in conjunction with Shand Cycles over at their workshop in Livingston, and at the bargain price of £20 for the day it was right up my street! My lovely wife was alerted to the details of the course and the next day she surprised me by booking me a place.
The main event
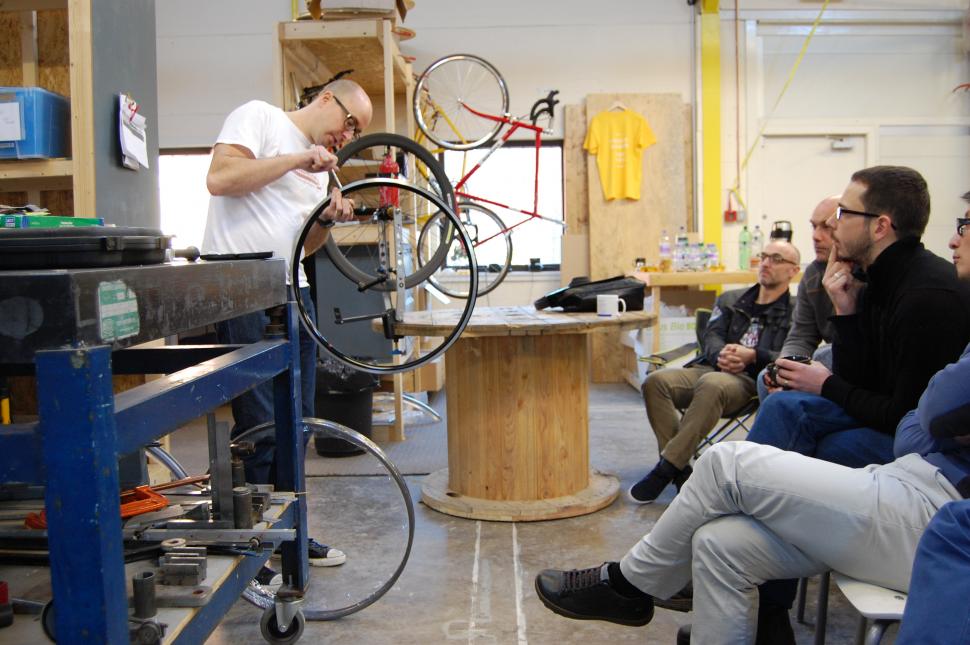
Derek took us through the various components that constitute a wheel, letting us look and feel them as constituent parts, seeing how they may feel flimsy, how they bend, or in the case of a hub, how heavy it is. Choosing parts to work together isn't quite as simple as it seems, spoke lengths are a mystery, they rely on so many variable factors that it can sometimes catch out the professionals, especially when dealing with certain rims where the ERD (effective rim diameter) varies! It was interesting to understand the reasons he selects components for his builds. Again, it varies, but the first principle is that you want something that is reliable.

Dishing the dirt
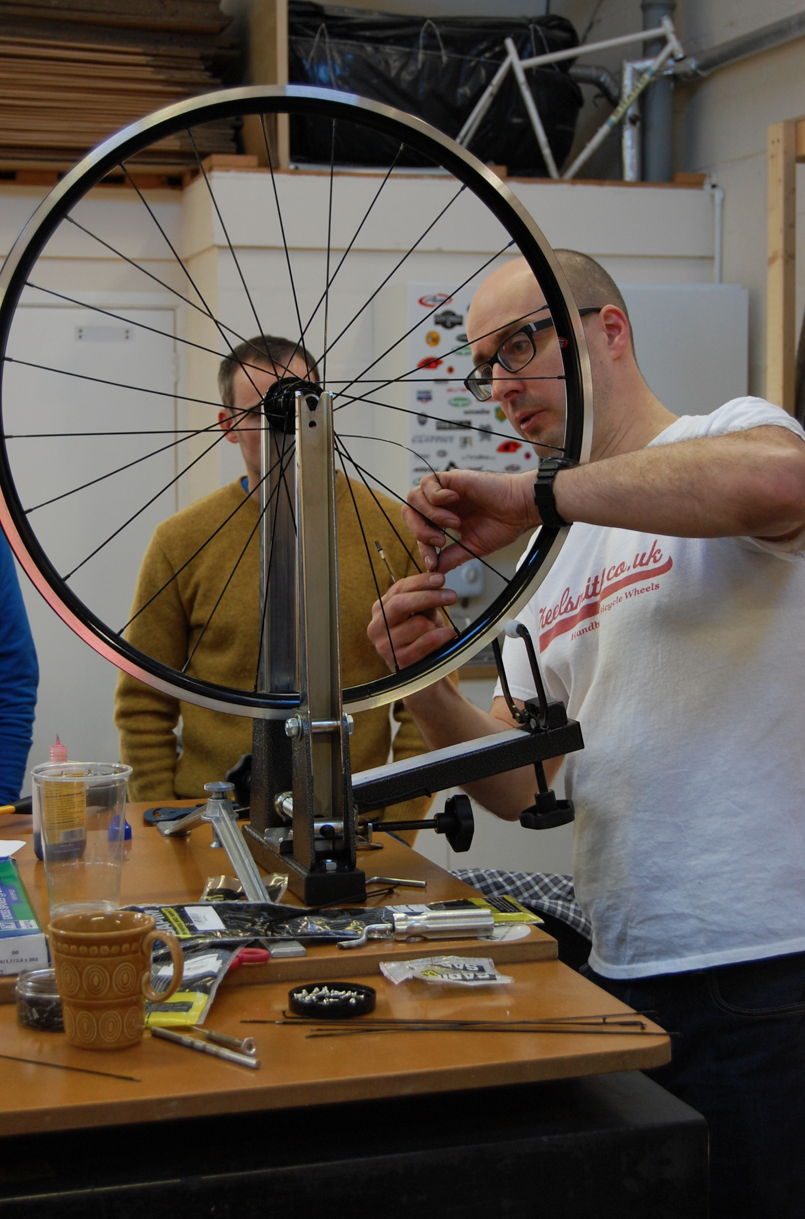
Derek then laced up a wheel, showing us what he considers to be the most straight forward lacing pattern with the greatest chance of success. It busted some of the myth around wheel lacing that had caught me out when I'd attempted it myself. The most interesting bit (for me) was yet to come: how to dish a wheel. I learned from the course that our club wheel jig, although good, is out of tune so the self-dishing doesn't work at the moment and the rear wheels I knocked together were both out of dish by 5mm. Turns out... I'd been tweaking the wrong nipples; I should've been tightening the non drive side spokes instead of the drive side! It seems so simple, but at 10.30pm in a darkened shed, it all went terribly wrong for me. At least I now know what I need to do next time.
Courseing around
By the end of the day, Derek had laced wheels, tensioned them, shown us how to do some of the things he did and told us (though not exhaustively) not what to do. The course itself was exactly what it said on the tin, an introduction. It wasn't an exhaustive tuition course, which left the attendees able to build wheels like they'd been doing it their whole lives, but it familiarised us all with how wheels are built by hand and the work that goes in to selecting components, assembling, truing, dishing and tensioning. If you're into that sort of thing, then there may well be more courses in the future, so keep your eyes on the Wheelsmith website and twitter account.
For someone like me, it was a great experience, it allowed me to ask the questions I wanted to ask, it allowed me to understand some of the jargon I'd read in various books about wheel-building, but most of all, after having just about buggered up some wheels fairly recently, it gave me the will to have another go at wheelbuilding! It will have given the folk attending different degrees of clarity and understanding, but Derek is happy if it gives someone the confidence to pick up a spoke key and true up that wheel they have that is kicking the brake pads.
Location, location, location
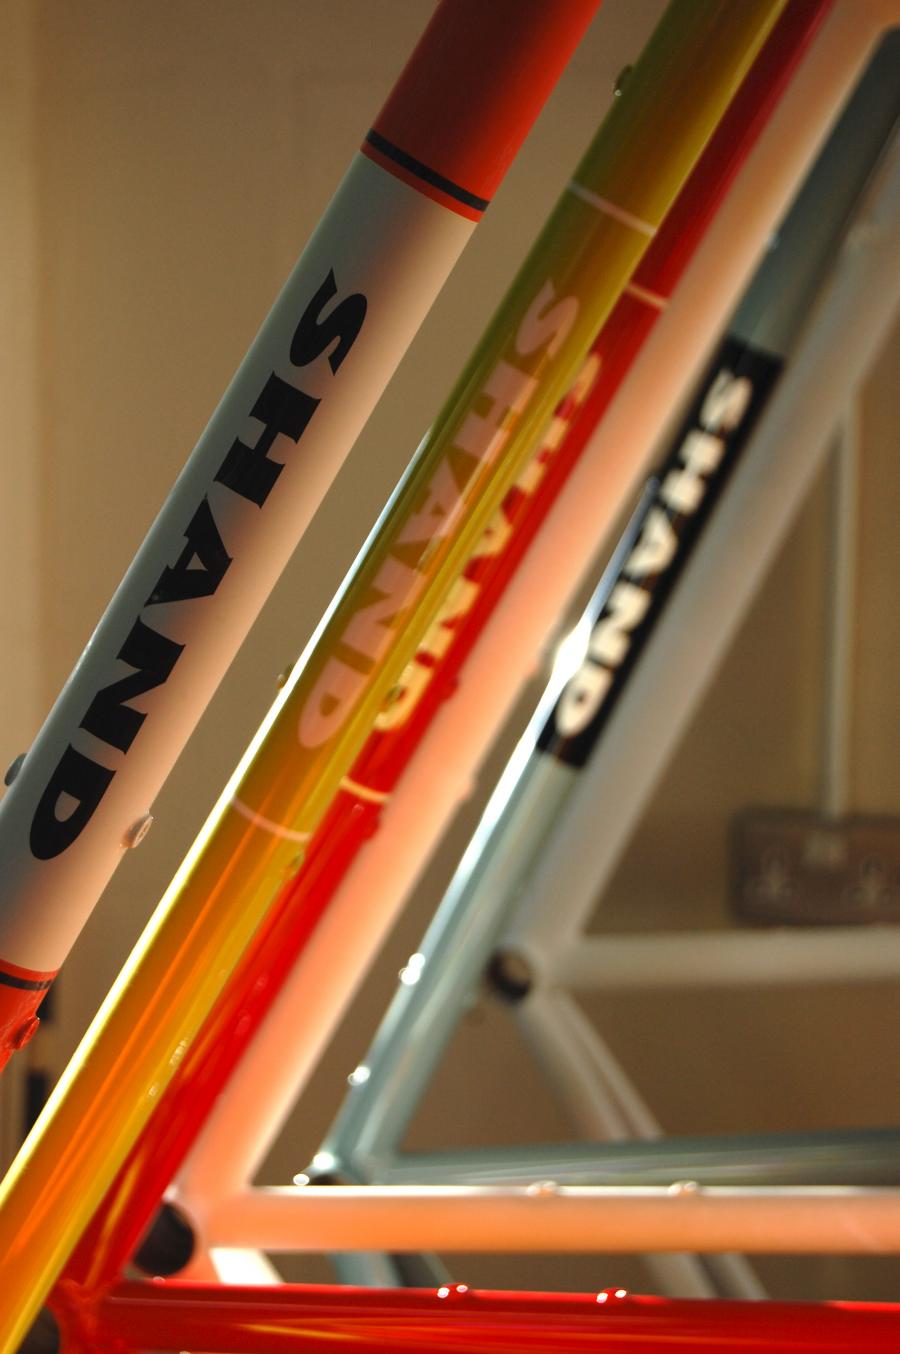
The other benefit of the course was that it was held at Shand Cycles. If you're not aware of Steven Shand, then you should be. His workshop produces beautiful steel bikes, I'd previously seen fully built bikes, but never had a chance to look at them up close, now that I have, I'm even more impressed. The workshop is tidy and modern, none of the lumps of wood and antique kit that might spring to mind when you think of handmade steel frames, it's relaxed and has a good feel about the place. It might not be like that mid-week when orders are being built, but it was fascinating to see how bespoke manufacturing is approached by Steven and his team. Thanks to Derek and Steven for chatting about their approach to their specialities; they're both enthusiastic about their products, it's infectious to hear them talk and to see what they do.
As for me, a Shand with Wheelsmith handbuilt wheels has been added to the (ever-expanding) wishlist!
More Opinion
Latest Comments
- Rendel Harris 2 sec ago
Nobody "deserves" to be spat on, be they riders, fans or anyone else. Saying that riders shouldn't spit on spectators isn't demanding they act like...
- Another_MAMIL 10 hours 58 min ago
Q36.5 Gregarius Essential Bib Knickers fit the bill: 3/4 length bib tights for warm weather.
- Rendel Harris 11 hours 8 min ago
Jolly good. Only it hasn't been and it is still a public bridleway. Feel free to look it up.
- jaymack 11 hours 58 min ago
"...it feels more like a £100+ jersey". It's almost as if cycling apparel is over priced.
- mike the bike 13 hours 11 min ago
I've had a few Lezyne bits and bobs over the years and while it's true I've never bothered to return anything under warranty, I've had a couple of...
- mark1a 12 hours 14 min ago
There's a transition period. For the benefit in kind (BIK) tax to the employee, it will be treated as a goods vehicle as it is now (rather than a...
- hawkinspeter 13 hours 22 min ago
Parents say East Bristol Liveable Neighbourhood makes roads '100 times safer' for children:...
- mdavidford 13 hours 28 min ago
Isn't basically all carbon recycled? From stars?
- velodinho 14 hours 44 min ago
As witnessed at so many infrastructure improvement projects similar to this one, all those who object should ignore the consultation and pray at...
- Nagai74 16 hours 32 min ago
It's a DLO to those in the trade.


Add new comment
9 comments
I'd checkout Pete Matthews in the NW. He's made wheels for Robert Miller and will build for all sorts of disciplines. I've had a pair for 3 years ( maybe 6,000 summer miles) and they've yet to need trueing. Things of beauty too.
I did a few rebuilds and builds from scratch last year - agree with the comment about being like making fire. It's a very zen thing: you have to take your time and enjoy being in the moment. If it's not right then you have to be prepared to start over rather than keep trying to rescue a flawed build.
I used an iOS app (Spoke Tensioner) for tension: you enter the spoke length (between cross and nipple) and gauge and it works out the tension from the sound when you ding it. I haven't got a spoke meter to act as a reference so can't comment on the absolute numbers but it did give me a bit more confidence that I was in the right ball-park.
For instance I built up a pair on Open Pros / Novatec disc hubs and was mindful of the maximum tension stated by Mavic. I built to that level of tension as measured by the app - the spokes felt a lot looser than my machine built wheels and without a readout I would've gone much tighter. However the wheels have been brilliant for over the last year and are still perfectly true despite the London potholes.
I bought a mild steel "ghetto" truing stand from a guy on eBay (petextr997) for £55: it's great. I also bought a Park dish tool but this is superfluous - I find it much easier to just turn the wheel around in the stand.
Big learning for me: worry about dish and getting the hub centred first before truing. It's much harder to fix a non-centred a non-round wheel once it's up to tension. And get good quality spoke keys.
A small selection of what I learned from having a go this year:
You won't save much money on full price parts list over sites like Rose, but the satisfaction of building your own is immense. If you can pick up bargain parts as the year goes on then you're ahead cost-wise and you might get lucky with ebay spoke sizes.
A good book and time to digest what the author is trying to tell you are invaluable. Read, re-read and re-read again. Or take a bit of a short cut like Sam did above, but successful wheel building and short cuts do not seem to go well together.
Get rims before buying spokes so you can confirm that the ERD the manufacturer has given you is wrong by a mm or two and on cheaper or flimsier rims varies as you go round.
Take time to take measurements, and do it again, and once more for luck. Use several spoke calcs and take an average. Then be prepared to disregard this carefully obtained data as you can't get the right size of the particular spoke you want.
Take time to run through lacing the first time, check it and then undo it all and start again.
Frame, hand, brain and eye. You do not need a wheel jig or any special tools other than a spoke key. A home made nipple driver makes life easier for the first tightening and shaved down cotton bud is pretty handy for putting the spokes in. Dishing tool can be cut out of cardboard. A tension what? Of course, if you want to spend, then spend.
The satisfaction from building your own is immense... did I say that already?
I've got to say that further east Craig Hardie at Hardie Bikes is also a well skilled builder especially if you are looking for some bling bling MTB or BMX wheels.
If I could build my own wheels then I would definitely feel more of a man! I reckon it is up there with making fire using only a couple of twigs.
I'm getting one of those cheaper Park truing stands for Christmas
Should pay for itself in a couple of years.
Worth checking out the Webbline wheel jig http://www.webbline.co.uk/default.asp?pID=11
Spoilt for choice in Scotland with Big Al at wheelcraft and Derek at Wheelsmith on our doorstep.
I'm a big Al man myself, being a traditionalist, and liking the banter and the unique way his shop is stocked!
Derek is the man for those that like cutting edge tech and a clinical workshop.
With both these guys locally, not May people round here do their own wheels.
Yeah, Big Al's is a fantastic shop, it's like something from the past. You can lose a day in there just nipping in for 5 minutes!
Also worth checking out Mark Leadbetter http://www.markleadbetter.co.uk/ he's another specialist wheelbuilder and a great mechanic too.